
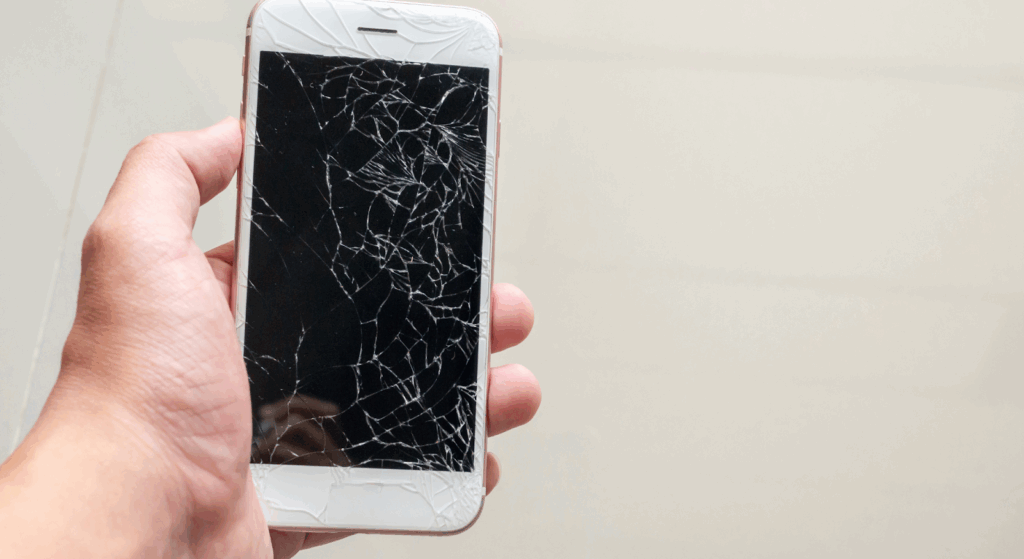
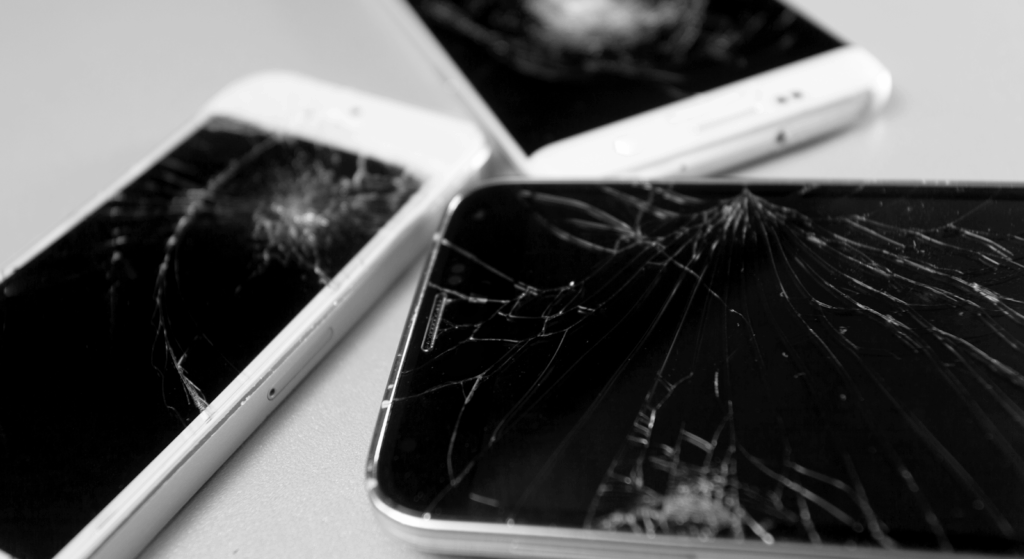
A cracked or unresponsive phone LCD screen can make a perfectly working smartphone unusable. If you’re searching for how to fix a phone LCD screen, it usually means the display is damaged, flickering, or completely black after a drop or impact.
This guide explains how phone LCD screen repair really works, when an LCD can be repaired, and when a full-screen replacement is the only reliable option. This guide focuses on the correct repair process, required tools, and essential safety precautions.
What Does “Fix LCD” Really Mean?
When people search for how to fix an LCD, they often mean different things. In professional phone repair, “fixing” an LCD can involve several very different scenarios, and understanding the difference is critical before starting any repair.
LCD glass damage refers to cracks in the outer glass screen, while the display and image underneath still work normally. In most modern smartphones, the glass is fused to the LCD or OLED panel, making glass-only repair impractical for repair shops.
LCD failure occurs when the screen displays no image, shows lines, flickers, discoloration, or remains black, even though the phone powers on. This indicates the LCD panel itself is damaged. Touch digitizer issues occur when the display shows an image, but the touch response is inaccurate or completely unresponsive. In many phone models, the digitizer is integrated into the screen assembly.
In professional repairs, LCDs are usually replaced, not repaired, because full-screen replacements are faster, more reliable, and reduce return and warranty risk compared to partial fixes.
Common Causes of Phone LCD Damage
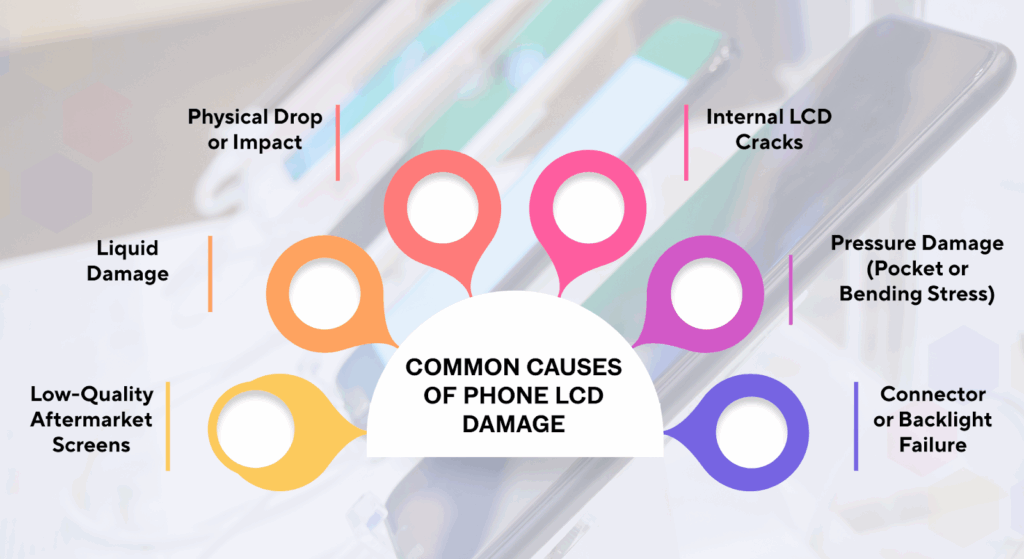
Phone screens have display components made of layered glass, liquid crystals, backlight systems, and flex connections. Damage does not always come from obvious cracks. In many professional repairs, the LCD fails internally while the glass appears intact.
Physical Drop or Impact
Drops are the most common cause of LCD screen failure. Even when the glass screen does not visibly crack, sudden impact can damage the internal LCD layers or disrupt the backlight. This often results in black screens, vertical lines, flickering, or color distortion.
Repeated minor drops can also weaken the LCD over time, leading to delayed failure. Badly cracked screens might not be repairable in many cases. So using a reliable screen protector can help you avoid this.
Internal LCD Cracks
Internal cracks occur beneath the glass and are not always visible from the outside. These cracks disrupt the liquid crystal layer, resulting in dark spots, bleeding ink, or partial image loss. In these cases, glass-only repair is not possible. The LCD panel must be replaced as a complete screen assembly.
Liquid Damage
Moisture exposure from spills, rain, or humidity can seep into the LCD layers or connectors. Liquid damage often causes flickering, a dim display, touch delay, or complete screen failure. Even after drying, corrosion can continue spreading, making LCD replacement the safest long-term repair option for most phones.
Pressure Damage (Pocket or Bending Stress)
Sitting on a phone or carrying it in a tight pocket can apply uneven pressure to the LCD. This is common with larger smartphone displays. Pressure damage can cause display shadows, color shifts, or delayed response. Unlike impact damage, pressure issues often worsen gradually over time.
Low-Quality Aftermarket Screens
Using poor-quality replacement screens increases the risk of early LCD failure. Low-grade panels may have weak backlight components, inconsistent resolution, or fragile glass layers. These screens are more prone to cracking, overheating, and connector failure, resulting in higher repair-shop return rates.
Connector or Backlight Failure
Not all display issues originate from the LCD panel itself. Loose connectors, damaged flex cables, or backlight circuit failure can mimic LCD damage. Professional technicians often test with a known-good screen to confirm whether the issue is the LCD, the backlight, or another internal component before proceeding with replacement.
How to Diagnose LCD Screen Problems Before Repair?
Before deciding how to fix a phone’s LCD screen, a professional diagnosis is critical. Many display issues that appear to be a damaged LCD screen can actually originate from the battery, the motherboard, or the display connectors. Accurate diagnosis helps repair shops avoid unnecessary screen replacement, reduce return rates, and protect the device warranty.
Symptoms of a Damaged LCD Screen
A failing or broken phone LCD usually shows clear visual symptoms that distinguish it from simple glass damage or software issues.
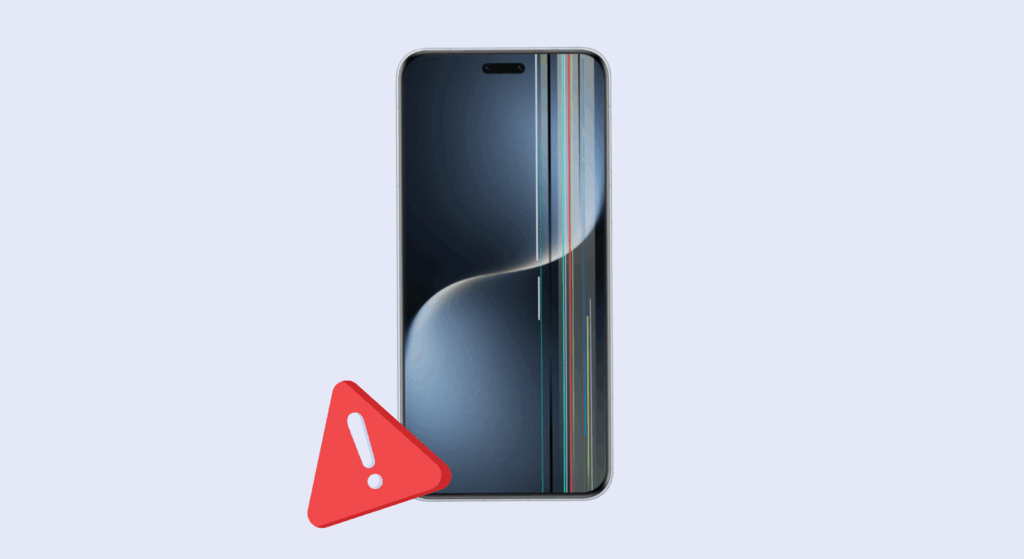
- Black screen but phone is on: The device powers up, receives calls, or produces sound, but the display shows no image. This often indicates LCD panel or backlight failure rather than cracked glass.
- Vertical or horizontal lines: Persistent lines across the screen usually indicate internal LCD cell damage from impact or pressure, even if the glass screen appears intact.
- Flickering or dim display: Uneven brightness, flickering, or unexpected dimming may indicate issues with the backlight circuit or a failing LCD screen assembly.
- Color distortion or blotches: Discolored patches, inverted colors, or washed-out areas suggest damage to the LCD layer, not the outer glass.
- Touch works but no image: If touch input responds but there is no visible image, the digitizer is working while the LCD has failed. In most cases, replacement is required.
These symptoms typically indicate that the LCD screen cannot be repaired and must be replaced to restore proper display performance.
LCD vs Motherboard vs Battery Issues
Not every dark or unresponsive screen is an LCD problem. Professional repair shops use quick isolation methods to identify the real fault.
- Testing with a known-good screen: The fastest and most reliable method is connecting a tested replacement screen. If the display works normally, the original LCD is confirmed faulty.
- Battery-related display issues: A deeply discharged or failing battery can cause the screen to stay black or flicker. Technicians often test with an external power source before replacing the LCD.
- Motherboard or connector faults: Damaged display connectors, corrosion from liquid damage, or backlight circuit failure on the logic board can mimic LCD failure. Visual inspection and connector reseating are standard checks.
Accurate diagnosis ensures technicians choose the correct repair option, avoid replacing good parts, and deliver consistent results across most phone models, including iPhone screen repair cases.
How to Fix LCD Screen on Phone (Professional Workflow)?
This workflow is written for repair shops, technicians, and serious DIYers who need a reliable, repeatable process for phone LCD service. Follow each step in order, use ESD protection, and test thoroughly before sealing the device.
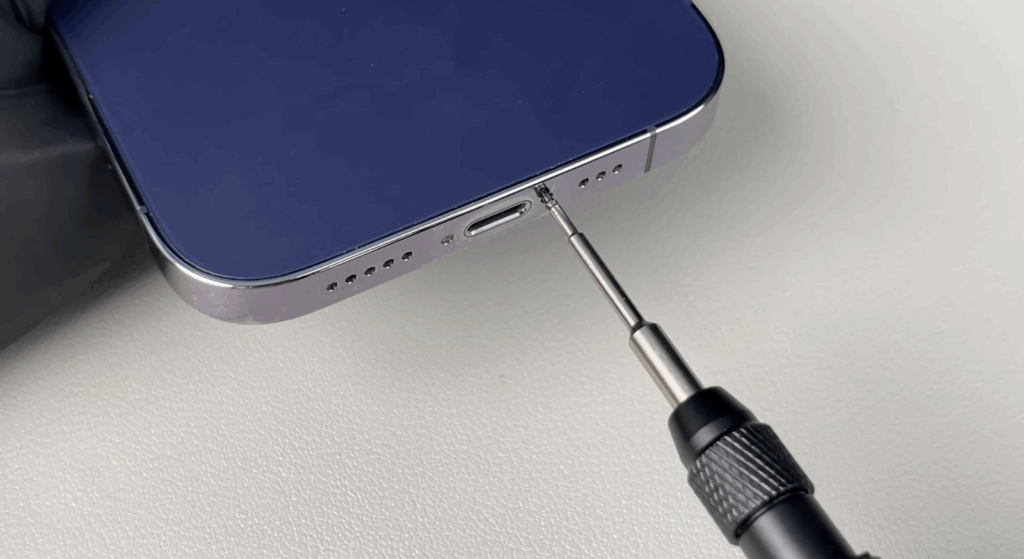
Step 1: Power Off, ESD & Safety Preparation
Always power the device off and work on an ESD-safe bench. Use an ESD wrist strap and anti-static mat; disconnect all external power. If the phone’s battery is accessible internally, disconnect the battery connector as the first electronic disconnection to remove power from the logic board and reduce the risk of a short circuit.
Avoid puncturing swollen batteries, and never expose them to excessive heat. These are basic safety rules used by pro shops and OEM repair guides.
Quick checklist: Power off, ESD strap, clear work area, discharge battery <25% if possible, PPE (safety glasses, gloves).
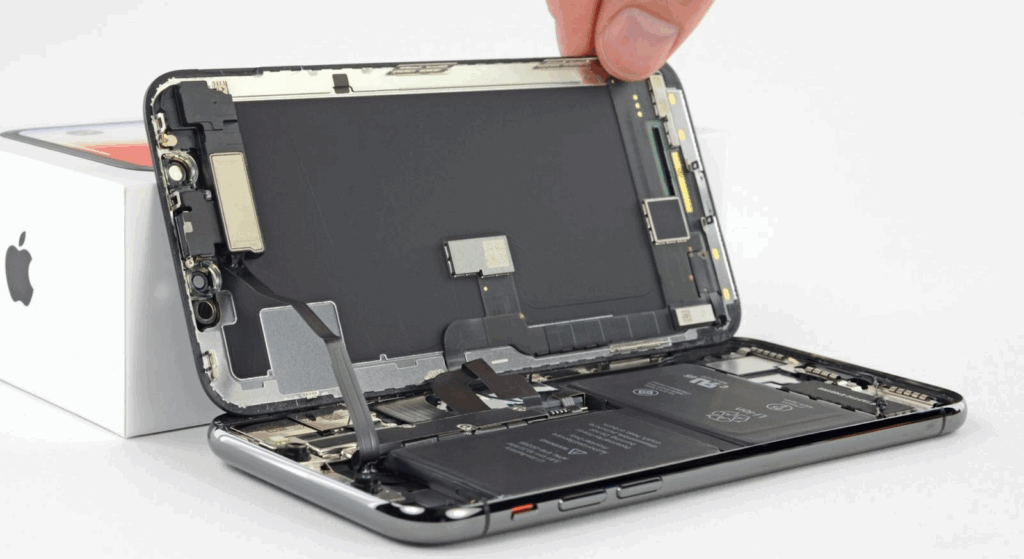
Step 2: Open the Device & Soften Adhesive
Remove external screws (pentalobe on many iPhones) and warm the screen edge using a controlled heat source (heat pad, separator machine, or a heat gun/hair dryer). Target ~70–90°C at the bezel to soften adhesive, avoid overheating (the LCD polarizer and battery are sensitive above this range).
Use a suction cup to lift the display lip, then insert the marked opening picks (limit depth to ~3 mm) and work clockwise to separate the adhesive without prying deeply into the frame. Professional shops use digital heat stations or separators for even heating.
Pro tip: If the display is cracked and shards are loose, tape the screen first to prevent glass chips from falling into the chassis.
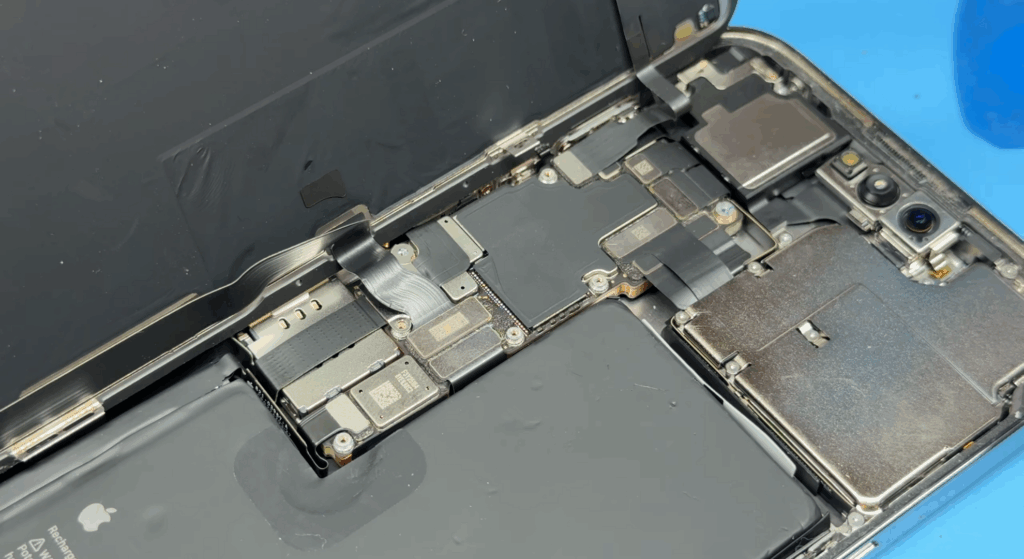
Step 3: Disconnect Display, Sensors & Battery Connector

Prop the display open (do not remove); remove the display bracket screws and lift the connector shield. Use a plastic spudger to disconnect the battery connector before touching any display/sensor cables. This prevents accidental powering of the board during work.
Remove the front camera/sensor assembly or protect it with stickers if you’re not transferring components. Follow OEM-style screw maps to keep track of screw lengths and locations.
Warning: Face ID and True Tone systems are sensitive. If your model transfers these modules, document the orientation and cable routing.
Step 4: Remove the Damaged LCD / Inspect Flex & Backlight Circuit
Apply additional localized heat or use an adhesive solvent (IPA) to soften the battery/display adhesive. Carefully pry the LCD away from the frame with plastic tools; avoid metal picks, as they can puncture the battery or damage the backlight. Inspect all flex cables, connectors, and the backlight/bias circuits for corrosion, tears, or lifted pads.
If the backlight driver or connector is damaged, repairs to the board may be needed rather than a straight panel swap. With the old screen disconnected, visually inspect the frame and connector area for bent pins, debris, or liquid residue.
Step 5: Fit & Test the Replacement Screen Before Final Sealing
Connect the replacement LCD/display assembly and, with the battery still temporarily disconnected (some shops connect the battery to test, but best practice is to use a test cable or bench power with current limits), power the device to run a quick test: display image, backlight uniformity, touch responsiveness, multi-touch, proximity sensor, and Face ID/camera (if applicable).
For Android devices, use built-in test menus or diagnostic codes. If anything is off (dead pixels, flicker, ghost touch), do not seal the phone, troubleshoot connectors, replace the panel, or test another known-good screen.
Pro tip: Test brightness at multiple levels and check for backlight bleed in dark images.
Step 6: Reassembly, Adhesive & Water-Resistance Notes
Once the replacement screen passes tests, reconnect all cables in reverse order, replace shields, and reinstall screws to their original positions. Use new double-sided screen adhesive and battery adhesive to re-seal the device.
Note that most third-party repairs will not fully restore the factory IP water resistance; inform customers about this and record it in the repair ticket. Align the top clips first, then press the perimeter to seat the display evenly. Wipe all mating surfaces clean of dust and adhesive residue before seating the display.
Step 7: Full Post-Repair QA & Calibration
After reassembly, run a full quality check: power cycle, check display color accuracy, run touch and multi-touch tests, test Face ID/cameras, test wired and wireless charging, and run a short stress test (play video for 1–2 minutes) to observe heating or flicker.
Optionally calibrate/display reporting by fully charging to 100% and discharging once to 0% over a day if the customer requests calibration for battery reporting. Document the serial/part numbers for traceability. Verify customer-facing features (call, speaker, mic, proximity) and note return/warranty terms.
Safety Warnings & Best Practices
- Always disconnect the battery connector before performing board-level work.
- Use ESD protection and ESD-safe tools.
- Limit heat to ~70–90°C when softening adhesive; excessive heat can damage LCD, polarizer, or battery.
- Never use metal pry tools under battery cells. Avoid punctures; punctured Li-ion cells can ignite.
Phone LCD Screen Repair Steps (Quick Reference Table)
| Step | Action | Professional Tip |
| Diagnose | Confirm LCD screen failure | Always test with a known-good screen to rule out motherboard or battery issues. |
| Power Off | Shut down the device and disconnect the power | Discharge battery below 25% to reduce short-circuit risk |
| Open Device | Apply controlled heat and a separate screen | Use a heat gun or heat pad evenly to avoid frame warping |
| Remove LCD | Disconnect the screen assembly and flex cables | Never pull cables; lift connectors straight up |
| Inspect Components | Check connectors and backlight circuit | Look for bent pins, corrosion, or burn marks |
| Install Replacement | Connect the new LCD screen | Test the display before sealing the phone |
| Functional Test | Verify brightness, touch, and color | Check for flicker, dead pixels, or touch lag |
| Reassemble | Apply adhesive and close the device | Use fresh adhesive or double-sided tape for a proper seal |
| Final Check | Clean the screen and test again | Confirm uniform brightness and stable display |
LCD Screen Repair vs Replacement: Which is the Better Fix?
For most modern smartphones, especially iPhones, LCD replacement is more reliable than attempting a repair. While minor glass damage can sometimes be repaired, internal LCD issues usually cannot be permanently fixed.
From a cost vs durability perspective, repairing an LCD may seem cheaper upfront, but it often leads to repeat failures. Micro-cracks, weakened pixels, or backlight issues tend to resurface after short use, increasing return rates and warranty claims.
Industry data and repair shop experience show that full LCD replacements have a significantly lower return rate than partial repairs. A new screen assembly restores brightness, resolution, and touch performance more consistently.
For professional repair shops, the recommendation is clear: replace the LCD screen rather than repair it to ensure long-term reliability, customer satisfaction, and reduced rework.
iPhone LCD Screen Repair (Model-Specific Notes)

iPhone LCD screen repair varies by model. Apple has used LCD screens and OLED displays differently over the years, which affects repair methods, parts selection, and post-repair behavior. Repair shops must understand these differences to avoid sensor issues, display warnings, or customer complaints.
iPhone Models That Use LCD
Apple used LCD technology primarily on non-Pro models before fully transitioning to OLED. Common iPhone models that use LCD screens include:
- iPhone 6, 6 Plus
- iPhone 6s, 6s Plus
- iPhone 7, 7 Plus
- iPhone 8, 8 Plus
- iPhone XR
- iPhone 11 (non-Pro)
These models use LCD screen assemblies with a backlight, making them thicker than OLED but generally easier and cheaper to replace.
iPhone LCD Repair Precautions
iPhone LCD repairs require extra care around sensors and software-linked components:
- True Tone retention: The original display IC must be transferred or programmed; otherwise, True Tone will be lost after a screen replacement.
- Proximity sensor alignment: Misalignment can cause screen blackout during calls or sensor malfunction.
- Face ID protection: While LCD models rely less on Face ID than OLED models, a damaged flex cable can still affect front camera functionality.
- Battery warning messages: LCD replacement does not usually trigger battery warnings, but improper reconnection can cause power or display issues.
LCD vs OLED Replacement for iPhone
In some cases, repair shops use LCD screens as replacements for OLED-based iPhones to reduce repair costs.
- When LCD is used: Budget repairs, resale devices, or insurance claims where the lowest cost matters more than display quality.
Cost vs Quality Trade-Off
LCD replacements are cheaper but offer lower brightness, thicker glass, and higher power consumption compared to OLED displays. For long-term performance and customer satisfaction, matching the original display technology is usually the better repair option.
Common Mistakes During LCD Screen Repair
Even experienced technicians can create repeat failures if basic repair discipline is skipped. Most LCD screen issues after repair are not caused by the screen itself, but by process errors during installation.
One of the most common mistakes is failing to test the replacement LCD before sealing the phone. If the screen has a defect or a connector issue, discovering it after full reassembly wastes time and increases the risk of returns. Using low-quality LCD panels is another frequent problem, often resulting in poor brightness, uneven backlighting, or early failure.
Technicians also damage flex cables by forcing connectors or misaligning them during installation. Overheating the display while loosening adhesive can permanently damage the LCD cell, while skipping ESD protection increases the risk of invisible electrical damage that causes delayed screen failure.
Caution: Replacing the LCD will void the phone’s warranty.
Choosing the Right LCD Screen for Repair (Important for B2B Buyers)
For repair shops and wholesalers, LCD screen quality directly affects return rates, customer satisfaction, and warranty costs. Choosing the right replacement is not just about price; it’s about long-term reliability.
OEM-grade LCD screens are manufactured to tighter tolerances, offering better brightness consistency, longer lifespan, and more stable performance across temperature and usage conditions. Aftermarket LCDs, on the other hand, vary widely in quality depending on materials, backlight design, and quality control.
Different quality grades exist within the LCD market. Lower-grade panels often suffer from uneven backlight, reduced resolution clarity, or faster degradation. These issues increase return rates, which directly impact profitability for repair businesses.
For B2B buyers, working with a stable supplier matters as much as the screen itself. Consistent sourcing, proper testing, and supply continuity help repair shops standardize their repair process, reduce callbacks, and scale operations with confidence.
Why Repair Shops & Wholesalers Choose SQLCD?
Reputable repair shops, businesses, and B2B buyers choose SQLCD because consistent quality and supply reliability matter more than short-term price savings in the LCD screen market.
- OEM-grade LCD screens are manufactured to meet strict performance and fit standards.
- Strict QC testing, including brightness uniformity, touch response, and connector inspection
- Stable supply chain for high-demand iPhone models, reducing stock-out risks
- Bulk pricing options that protect margins for repair shops and distributors
- Lower failure and return rates compared to average aftermarket LCD screens
- Professional technical support to assist with model selection and installation issues
This combination helps repair shops reduce callbacks, warranty claims, and operational delays.
FAQs
Can an LCD screen be repaired without replacement?
In most cases, no. If the LCD panel itself is damaged, replacement is the only reliable fix. Glass-only repair is limited and not recommended for professional repairs. Replacing screens is the most common method for fixing this issue.
How much does LCD repair cost?
LCD repair cost depends on the phone model and screen quality. For iPhones, professional LCD screen replacements typically fall within budget to mid-range pricing, compared to OLED. The cost depends on the LCD condition: whether it is completely dead or just has broken glass or lines.
How long does LCD repair take?
A professional repair shop can complete an LCD screen replacement in 30–60 minutes, depending on the device and adhesive complexity. It might take longer, depending on whether you are getting a professional or DIY repair.
Is LCD replacement permanent?
Yes, when a high-quality replacement LCD is installed correctly, it restores normal display function for long-term use.
Does LCD repair affect battery life?
LCD replacement itself does not affect battery life, but low-quality screens may increase power consumption due to poor backlight efficiency.
Is LCD repair safe for Face ID?
Yes, as long as the repair is done correctly and Face ID components are not damaged during screen removal and installation.
Conclusion
When dealing with LCD screen damage, replacement is more reliable than repair in nearly all professional scenarios. Accurate diagnosis, proper tools, and controlled repair steps are essential to avoid repeat failures.
For repair shops and wholesalers, using high-quality LCD screens is just as important as correct installation. Partnering with a reliable supplier like SQLCD ensures consistent performance, fewer returns, and long-term business stability. Contact us now to get a quote and bulk order.

